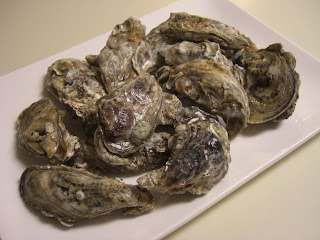
I admit that oysters may not be the prettiest shellfish, but they are decadently delicious and well worth the effort if you are up to the challenge. I discovered a quick and easy tip for shucking oysters which I would like to share with you.
I just got some oysters from Apalachicola, Florida. They have the perfect balance of sweetness combined with the salty ocean. Don't be turned off by the initial look of the oysters. Sometimes they will be cleaned, and sometimes not. The ones I just bought came Au natural, with the mud and all. See photo below.
Oysters Before Scrubbing
If your oysters are not already scrubbed, you will need to scrub them under running water. I purchased a great brush from the dollar store which is the perfect tool for this.
This Brush Is The Perfect Tool For Scrubbing Oysters
Clean Oysters After Being Scrubbed
When your oysters are clean, place them either one at a time, or no more than six at a time on a microwave safe dish with a little water at the bottom.
Oysters Before
Oysters After 45 Seconds
Place the dish in the microwave and cover with a microwave cover to prevent splashing. Microwave on high for approximately 15 to 30 seconds. Smaller oysters will be closer to 15 seconds, while the larger ones may take 20-25 seconds. Please note that if you go beyond 30 seconds, the oyster will start cooking and will have the texture and look of a steamed oyster, which is not bad if that's what you're going for. See the last photo featured below.
Here are oysters featured in the photo below which have been microwaved at 20 seconds. Note that the oyster liquor is retained as well.
If you don't have a shucking knife, a butter knife will do just fine.
COOK'S NOTE: REMEMBER THAT THE OYSTERS DON'T NEED TO BE OPENED FULLY FOR SHUCKING. ALL YOU NEED IS FOR THE SHELLS TO RELEASE ENOUGH SO THAT YOU CAN EASILY SEPARATE THE TWO SHELL HALVES. MICROWAVE TEMPERATURES MAY VARY ACCORDING TO APPLIANCE.


No comments:
Post a Comment